React 에서 useSelector 최적화 하는 3가지 방법.
 React | 2020-02-02
useSelector란?
useSelector 는 리덕스의 상태값을 조회하기 위한 hook 함수로 이전의 connect 를 통해 상태값을 조회하는 것보다 훨씬 간결하게 작성하고 코드가독성이 상승되는 장점이 있는 함수입니다. 사용방법은 다음과 같습니다.
//counterReducer에 있는 count 값 가져오기
const count = useSelector(state => state.counterReducer.count);

// 여러 reducer의 값 한번에 가져오기
const {counter, person }  = useSelector(state => ({
     count : state.counterReducer.count,
     person: state.personReducer.person,
}));
이를 통해 우선 useSelector 를 사용하는 간단한 예제를 작성해 보도록 하겠습니다.
예제 코드 작성
counter 리듀서 작성
import { createReducer, createAction } from 'typesafe-actions';
import { produce } from 'immer';

const prefix: string = 'COUNT_';

const INCREASE_COUNT = `${prefix}INCREASE_COUNT`;


export const increaseCount = createAction(INCREASE_COUNT);

export interface countReducerType {
  count: number;
  prevCount: number;
}

const initialState: countReducerType = {
  count: 0,
  prevCount: 0,
};

export default createReducer(initialState, {
  [INCREASE_COUNT]: (state, action) =>
    produce<setCountType>(state, draft => {
      draft.prevCount = draft.count;
      draft.count = draft.count + 1;
    }),
});
person 리듀서 작성
import { createReducer, createStandardAction } from 'typesafe-actions';
import { produce } from 'immer';

const prefix: string = 'PERSON_';

const SET_PERSON_NAME = `${prefix}SET_PERSON_NAME`;


export const setPersonName = createStandardAction(SET_PERSON_NAME)<string>();

export interface personReducerType {
  name: string;
  age: number;
}

const initialState: personReducerType = {
  name: '',
  age: 0,
};

export default createReducer(initialState, {
  [SET_PERSON_NAME]: (state, action) =>
    produce<setPersonType>(state, draft => {
      draft.name = action.payload;
    }),
});
위의 reducer들은 각각 다음과 같은 역할을 담당합니다.
- countReducer : 이전값과 현재값을 보여주고 increaseCount 함수를 통해 count를 증감시킵니다.
- personReducer : person의 정보를 보여주고 setPersonName함수를 통해 name를 변경합니다.
이제 각각 리듀서에 대한 컴포넌트를 작성하고 이를 합쳐서 보여주도록 하겠습니다.
countContainer 작성
import React from 'react';
import styled from 'styled-components';
import { useDispatch, useSelector } from 'react-redux';
import { RootState } from '../types/redux/RootState';
import { increaseCount } from '../store/reducers/countReducer';

type CountContainerProps = {}

function CountContainer({}: CountContainerProps) {

  const dispatch = useDispatch();
  const { count, prevCount } = useSelector((state: RootState) => ({
    count : state.countReducer.count,
    prevCount: state.countReducer.prevCount,
  }));

  const onIncreaseCount = () => dispatch(increaseCount());

  return (
    <S.CountContainer>
      <p>이전 count : {prevCount}</p>
      <p>현재 count :{count} </p>
      <button onClick={onIncreaseCount}>버튼 증가</button>
    </S.CountContainer>
  );
};

CountContainer.defaultProps = {} as CountContainerProps;

export default CountContainer;

const S: any = {};

S.CountContainer = styled.div`
`;
personContainer 작성
import React, { useState } from 'react';
import styled from 'styled-components';
import { useDispatch, useSelector } from 'react-redux';
import { RootState } from '../types/redux/RootState';
import { setPersonName } from '../store/reducers/personReducer';

type PersonContainerProps = {}

function PersonContainer({}: PersonContainerProps) {

  const [changeCount, setChangeCount] = useState('');
  const dispatch = useDispatch();
  const { name, age } = useSelector((state: RootState) => ({
    name : state.personReducer.name,
    age: state.personReducer.age,
  }));

  const onChangeName = () => {
    const updateName = changeCount +'이름추가 ';
    setChangeCount(updateName);
    dispatch(setPersonName(updateName));
  };

  return (
    <S.PersonContainer>
      <p>이름 : {name}</p>
      <p>나이 : {age}</p>
      <button onClick={onChangeName}>이름 변경</button>
    </S.PersonContainer>
  );
};

PersonContainer.defaultProps = {

} as PersonContainerProps;

export default PersonContainer;

const S: any = {};

S.PersonContainer = styled.div`
border-bottom: 1px solid #5c6370;
margin: 1rem;
`;
각각의 컴포넌트는 다음과 같은 역활을 수행합니다.
- personContainer : personReducer의 정보를 보여주고 name 값을 게속 이름추가 를 추가로 넣어줍니다.
- countContainer : 이전과 현재 count 값을 보여주고 count값을 증가 시킵니다.
container들을 모아주는 view 컴포넌트 작성
import React from 'react';
import PersonContainer from '../containers/PersonContainer';
import CountContainer from '../containers/CountContainer';

function Main() => {

  return (
    <>
      <PersonContainer/>
      <CountContainer/>
    </>
  );
};

Main.getInitialProps = async ({}) => {
  return {};
};

export default Main;
실행결과
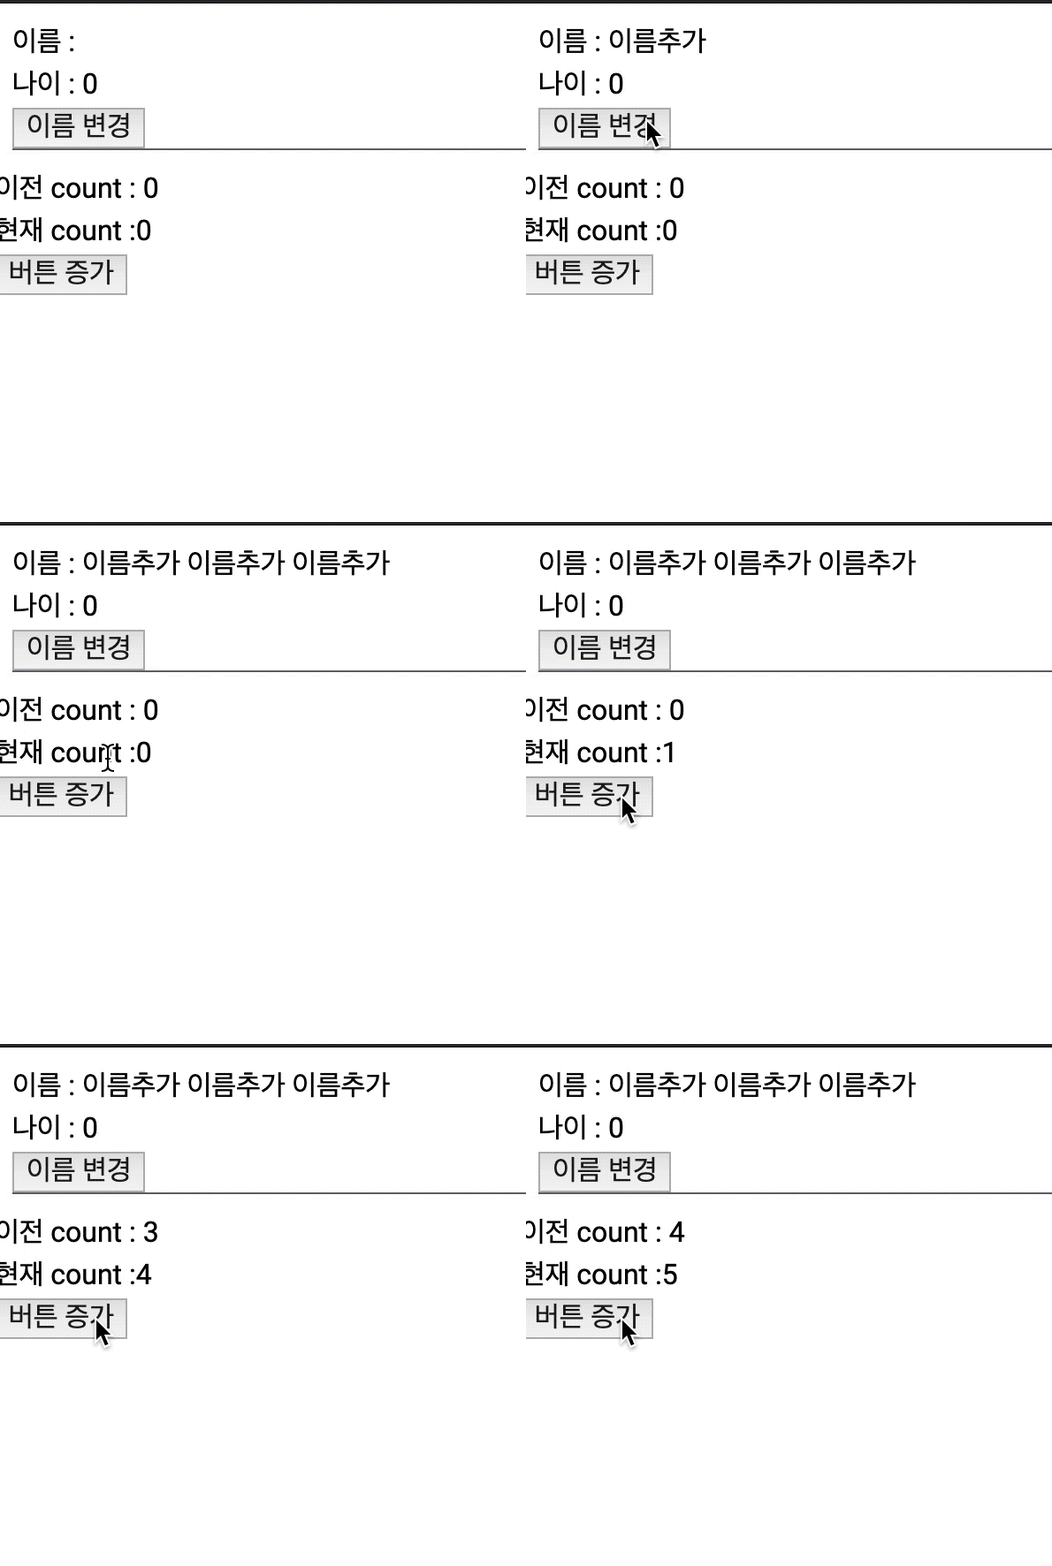
성공적으로 useSelector 를 통해 값을 조회하는 것을 볼 수 있습니다.
성능최적화
그럼 이제 위의 작업한 내용을 react 개발도구 를 실행시켜 최적화여부를 검사해 보도록 하겠습니다. 설치가 안되었다면 react-developer-tools 로 들어가 설치하면 됩니다.~
react-dev-tool 실행결과
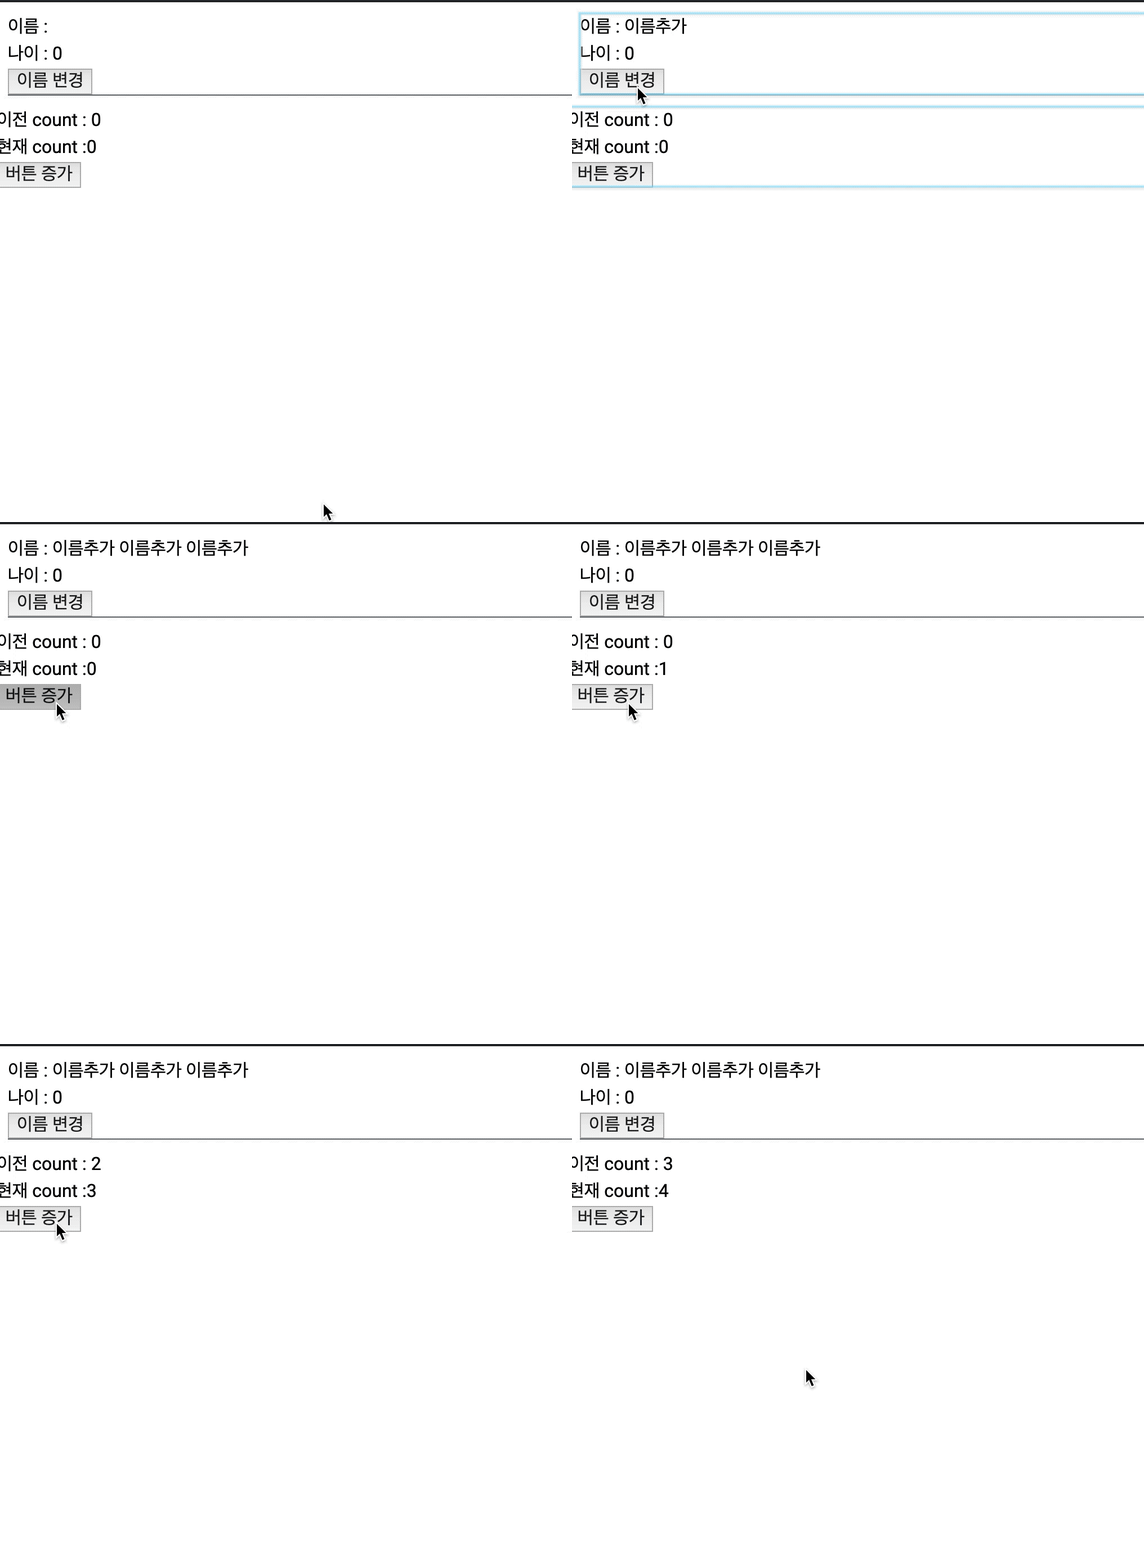
위의 하늘색으로 표기되는 부분은 컴포넌트가 다시 렌더링 되었다는 뜻입니다. 그러나 현재 예제의 personContainer 와 CountContainer 는 서로의 reducer 값을 조회를 안하지만 그럼에도 전부 다시 렌더링이 되고 있습니다.
다시 렌더링 되는 이유
  const { count, prevCount } = useSelector((state: RootState) => ({
    count : state.countReducer.count,
    prevCount: state.countReducer.prevCount,
  }));
위의 예시를 보면 count와 prevCount 를 조회할때 다시 객체를 생성하는 방식으로 선언하였기 때문에 react 에서는 이를 상태가 바뀌는 것의 여부를 파악할수 없어 무조껀 다시 렌더링 해버리게 됩니다.
첫번째 해결방법 - 독립 선언
위에서 선언한것처럼 객체 방식이 아닌 각각의 값을 독립적으로 선언하게 되면 이에대한 상태변경여부를 파악할수 있어 상태가 최적화 될 수 있습니다.
const count= useSelector((state: RootState) => state.countReducer.count);
const prevCount= useSelector((state: RootState) => state.countReducer.prevCount);
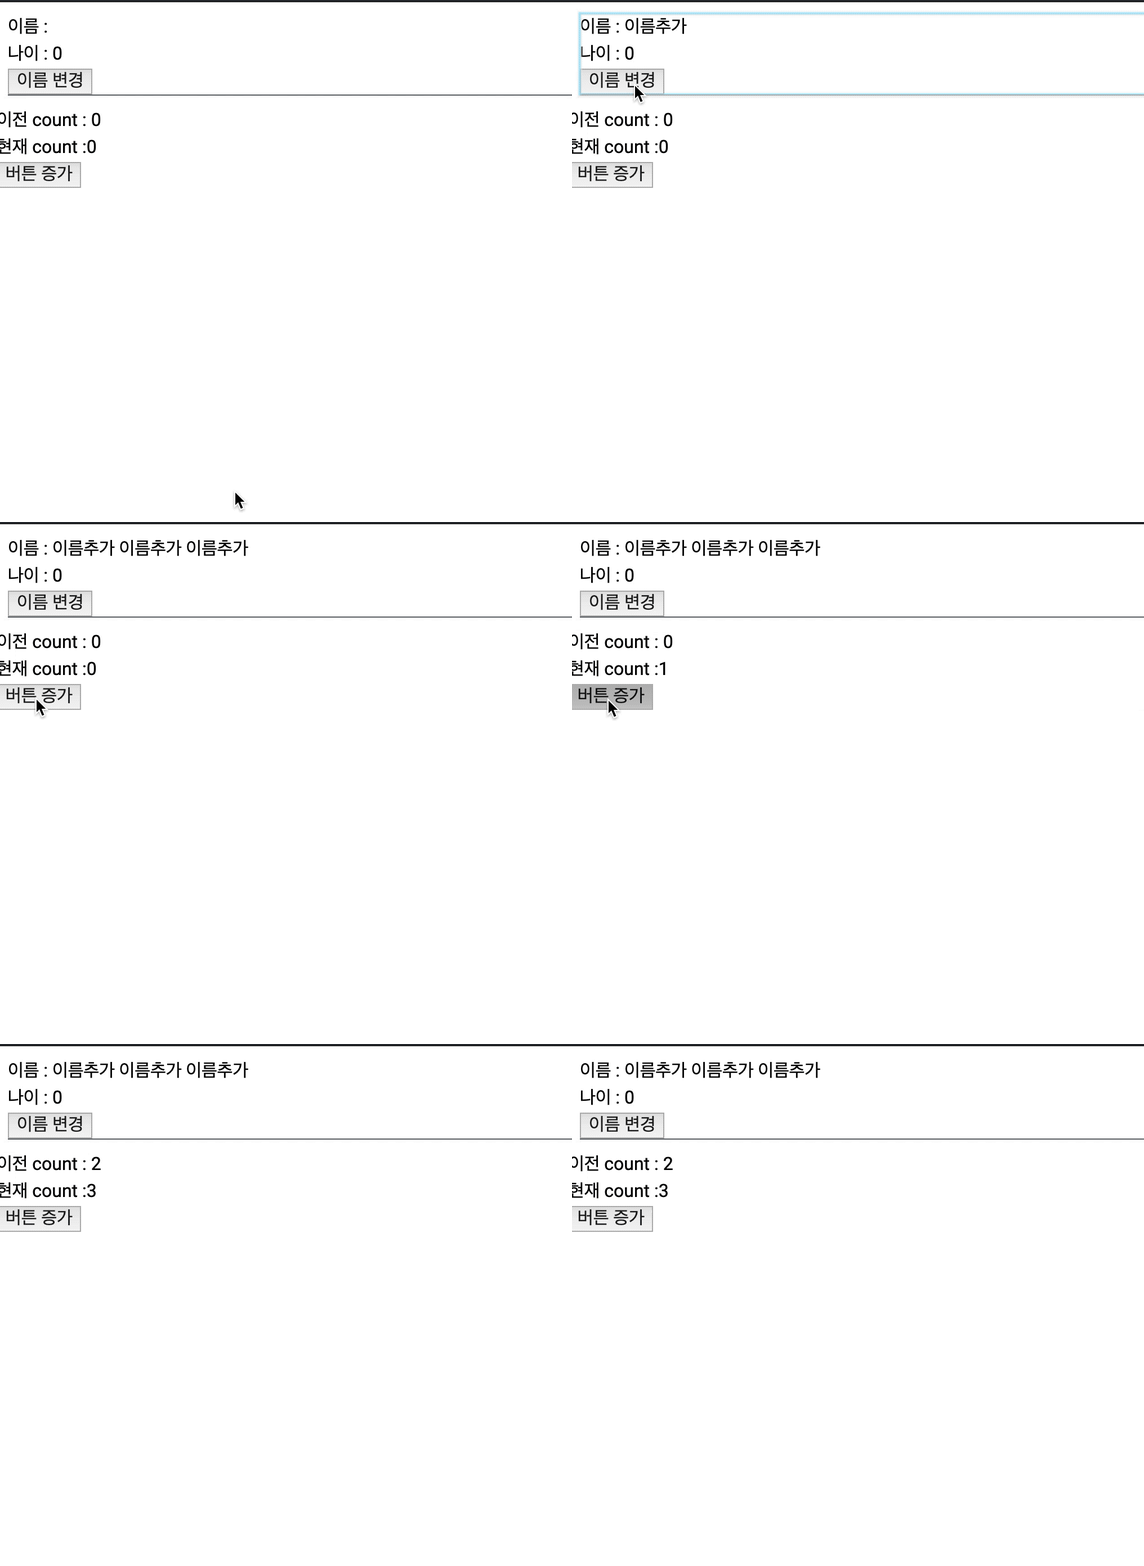
다음과 같이 선언하면 짜잔.!! 서로 값이 변경되어도 다시 랜더링 되지 않습니다.~!
두번째 해결방법 - equalityFn
useSelector 에는 다음과 같이 선택옵션으로 equalityFn 라는 파리미터가 존재합니다.
const result: any = useSelector(selector: Function, equalityFn?: Function)
의 함수 표현은 다음과 같습니다.
equalityFn?: (prev: any, next: any) => boolean
equalityFn 는 이전 값(prev)과 다음 값(next)을 비교하여 true가 나오면 다시 렌더링을 하지 않고 false가 나오면 렌더링을 진행 합니다.
이를 사용해 다음과 같이 작성하면 첫번째방법과 마찬가지로 최적화가 완료됩니다.!
  const { count, prevCount } = useSelector((state: RootState) => ({
    count : state.countReducer.count,
    prevCount: state.countReducer.prevCount,
  }),(prev, next) => {
    return prev.count === next.count && prev.prevCount === next.prevCount;
  });
세번째 해결방법 - shallowEqual
두번째 해결방법은 사실 이전값 다음값의 비교인데 위의 예시는 2개이지만 여러개일 겨우 항상 비슷한 내용을 반복해서 적어줘야 하는 번거로움이 존재합니다. 이를 위해 redux 에서 shallowEqual 라는 함수를 제공 합니다. shallowEqual 는 selector로 선언한 값의 최상위 값들의 비교여부를 대신 작업해 줍니다.
  const { count, prevCount } = useSelector((state: RootState) => ({
    count : state.countReducer.count,
    prevCount: state.countReducer.prevCount,
  }),shallowEqual);
위의 2번째 최적화 방법과 방식은 동일하지만 더욱 간결한 코드로 작성이 가능한 장점이 존재합니다. 이때 주의할 사항은 shallowEqual 은 최상위 값만 비교한다 입니다. 예를 들어 위의 prevCount 가 현재처럼 단순한 0이 아닌
prevCount = {
   a : 0,
   b : 1,
   c : {d :2}
}
일 경우 prevCount.a , prevCount.b, prevCount.c 는 비교하지만 prevCount.c.d 는 비교하지 않습니다.