Transparent Wrappers Pattern -vue (간단한 컴포넌트 래핑)
 vue | 2019-06-12
Transparent Wrappers Pattern은 vue 버전 2.4 부터 지원하기 시작한 $attrs, $listeners, inheritAttrs 속성을 활용하여 래핑하는 컴포넌트를 좀더 효율적으로 작성할 수 있는 패턴 입니다. 우선 각 속성에 대한 설명과 함께 사용하는 방식을 알아보도록 합시다.
inheritAttrs (2.4.0 이후 추가)
vue에서는 컴포넌트의 props로 설정하지 않은 속성값이 들어오게 되면 이를 루트 HTML 엘리먼트에게 할당하게 됩니다. 이를 정하는 속성은 inheritAttrs 입니다. inheritAttrs 는 기본값으로 true 로 설정 되어 있습니다. 설명이 어려운거 같지만 간단한 예제를 통해 쉽게 이해하실 수 있습니다.
baseInput 컴포넌트 작성
<template>
    <label>
        {{label}}
        <input id="baseInput" type="text"/>
    </label>
</template>

<script>
    export default {
        name: 'BaseInput',
         props: {
            label: {
                type: String,
                default: '',
            },
        },
    };
</script>

<style scoped>
</style>
위와같이 label 로 감싼 input 컴포넌트를 제작하였습니다.
부모애서 props 설정 하지 않는 값으로 내려주기
<template>
    <div class="base-test">
        <h1>inheritAttrsTest</h1>
        <base-input for="baseInput" />
    </div>
</template>
다음과 같이 props로 지정 하지 않은 for 라는 속성을 주입하였습니다.
결과 element 확인
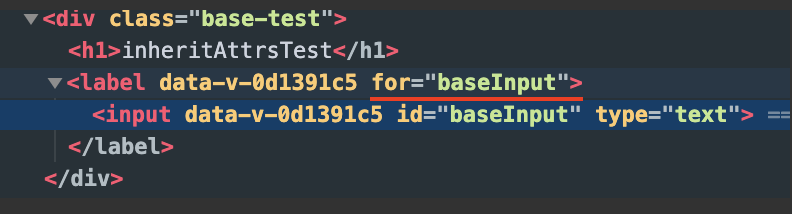
inheritAttrs 속성이 기본 true 로 적용되어 있어 baseInput 컴포넌트의 루트 엘리먼트인 label 태그에 속성 값이 흘러들어간 것을 확인 할 수 있습니다.
inheritAttrs 해제 후 확인
이번에는 inheritAttrs 옵션을 false 로 설정 후 확인해 보겠습니다.
<template>
    <label>
        {{label}}
        <input id="baseInput" type="text"/>
    </label>
</template>

<script>
    export default {
        name: 'BaseInput',
        inheritAttrs: false,
    };
</script>

<style scoped>

</style>
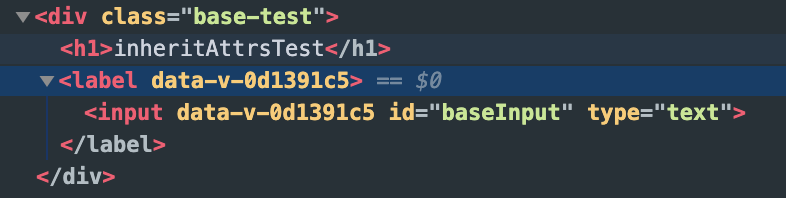
inheritAttrs 를 해제 하니 label 태그에 적용이 안되는 것을 확인 할 수 있습니다.
$attrs
inheritAttrs 를 통해 부모로 부터 정의되지 않은 props 를 받은 속성은 inheritAttrs 를 false 로 설정해도 루트 엘리먼트에 바인딩이 안되어 있지만 실제로 값이 없어지는 것은 아닙니다. 이런 속성들은 전부 $Attrs속성 에 저장되어 있습니다.
설정되지 않은 props 데이터 확인
위에서 inheritAttrs 를 false 로 설정한 컴포넌트를 vueDevTool 을 통해 확인해 보도록 하겠습니다.
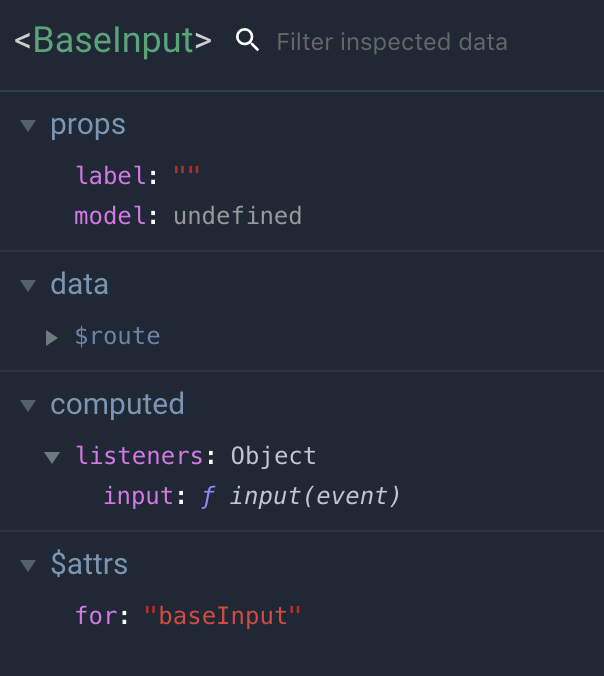
보시는 것처럼 실제로 값이 사라진건 아니고 $attrs 속성에 들어있는걸 보실 수 있습니다.
$attrs 과 inheritAttrs 를 활용한 컴포넌트
위에서 설명한 $attrs 속성과 inheritAttrs 속성을 활용하여 위의 baseInput 컴포넌트를 개선해보도록 하겠습니다.
baseInput 1차 개선
<template>
    <label>
        {{label}}
        <input id="baseInput" v-bind="$attrs"/>
    </label>
</template>

<script>
    export default {
        name: 'BaseInput',
        inheritAttrs: false,
        props: {
            label: {
                type: String,
                default: '',
            },
        },
    };
</script>

<style scoped>

</style>
우선 inheritAttrs 을 false 로 설정해 루트 엘리먼트로 흘러가지 못하도록 하고 부모로 부터 정의되지 않은 props 를 input 태그에 바인딩 시켜주었습니다. 이럴 경우 다음과 같이 사용할 수 있습니다.
baseInput에 직접 속성 적용
<template>
    <div class="base-test">
        <h1>inheritAttrsTest</h1>
        <base-input for="baseInput" placeholder="placeHolder입니다."/>
    </div>
</template>
적용 결과

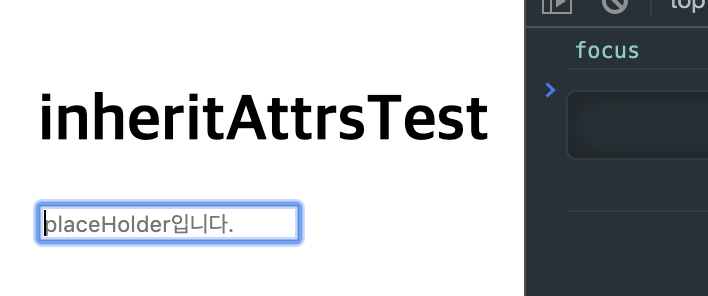
해당 방법을 쓰기 전에는 placeholder 에 대한 속성을 따로 props 로 지정하고 이를 바인딩 해주어야 했는데 그럴 필요가 없이 깔끔한 컴포넌트 구성을 볼수가 있습니다.!! 속성이 여러개라면 더욱 빛을 볼 수 있습니다. 이렇게 $attrs 과 inheritAttrs 를 사용하면 래핑하는 컴포넌트 를 효과적으로 제작할 수 있습니다.
$listeners
$listeners 는 부모에게서 받은 모든 v-on 이벤트를 가지고 있는 성입니다. (단 .native 수식어는 지원하지 않습니다.) 즉 이벤트 바인딩 정보를 가지고 있는 속성입니다.
이벤트 호출 샘플
<template>
    <div class="base-test">
        <h1>inheritAttrsTest</h1>
        <base-input for="baseInput" placeholder="placeHolder입니다."
                                    @eventCLick="inputClick"
                                    @click="inputClick"/>
    </div>
</template>

<script>
    export default {
        name: 'test-view',
        methods: {
            inputClick() {
                console.log('inputClick');
            },
        },
    }
</script>

<style scoped>
</style>
아까 작성한. baseInput 컴포넌트에 inputClick 이라는 콘솔을 출력하는 click 이벤트와 eventCLick 이벤트 를 주입하였습니다. 이제 baseInput 컴포넌트 에서 $listeners 속성을 출력해보도록 하겠습니다.
$listeners 출력
<template>
    <label>
        {{label}}
        <input id="baseInput" v-bind="$attrs"/>
    </label>
</template>

<script>
    export default {
        name: 'BaseInput',
        inheritAttrs: false,
        props: {
            label: {
                type: String,
                default: '',
            },
        },
        mounted(){
            console.log(this.$listeners);
        }
    };
</script>

<style scoped>

</style>
$listeners 출력 결과

다음과 같이 $listeners 속성에 부모로 부터 받은 모든 이벤트가 존재하는 부분을 확인할 수 있습니다. 해당 속성을 활용하면 $attrs 과 inheritAttrs 를 사용해 컴포넌트 속성을 래핑한것처럼 이벤트도 래핑할 수 있습니다.
baseInput 컴포넌트 이벤트 래핑
<template>
    <label>
        {{label}}
        <input v-bind="$attrs"
               v-on="listeners"/>
    </label>
</template>

<script>
    export default {
        name: 'BaseInput',
        inheritAttrs: false,
        props: {
            label: {
                type: String,
                default: '',
            },
        },
        computed: {
            listeners() {
                return {
                    ...this.$listeners,
                    input: e => this.$emit('input', e.target.value)
                }
            }
        }
    };
</script>

<style scoped>

</style>
위의 예시는 상위 컴포넌트에게 받은 이벤트 속성 인 $listeners에 input 변경시 emit 하는 이벤트를 추가하여 input 태그에 바인딩 한 것 입니다. 위의 input: e => this.$emit('input', e.target.value) 를 보면 v-model 방식이 떠오르실텐데요. 맞습니다. 해당 이벤트를 바로 바인딩 하기 위함입니다.
바인딩 사용 예시
<template>
    <div class="base-test">
        <h1>inheritAttrsTest</h1>
        <base-input for="baseInput" placeholder="placeHolder입니다." @focus="focus" v-model="inputValue"/>
    </div>
</template>

<script>
    export default {
        name: 'test-view',
        methods: {
            focus() {
                console.log('focus');
            },
        },
        data() {
            return {
                inputValue:""
                }
            }
        },
    }
</script>

<style scoped>
</style>
focus 시 출력
v-model 바인딩 결과
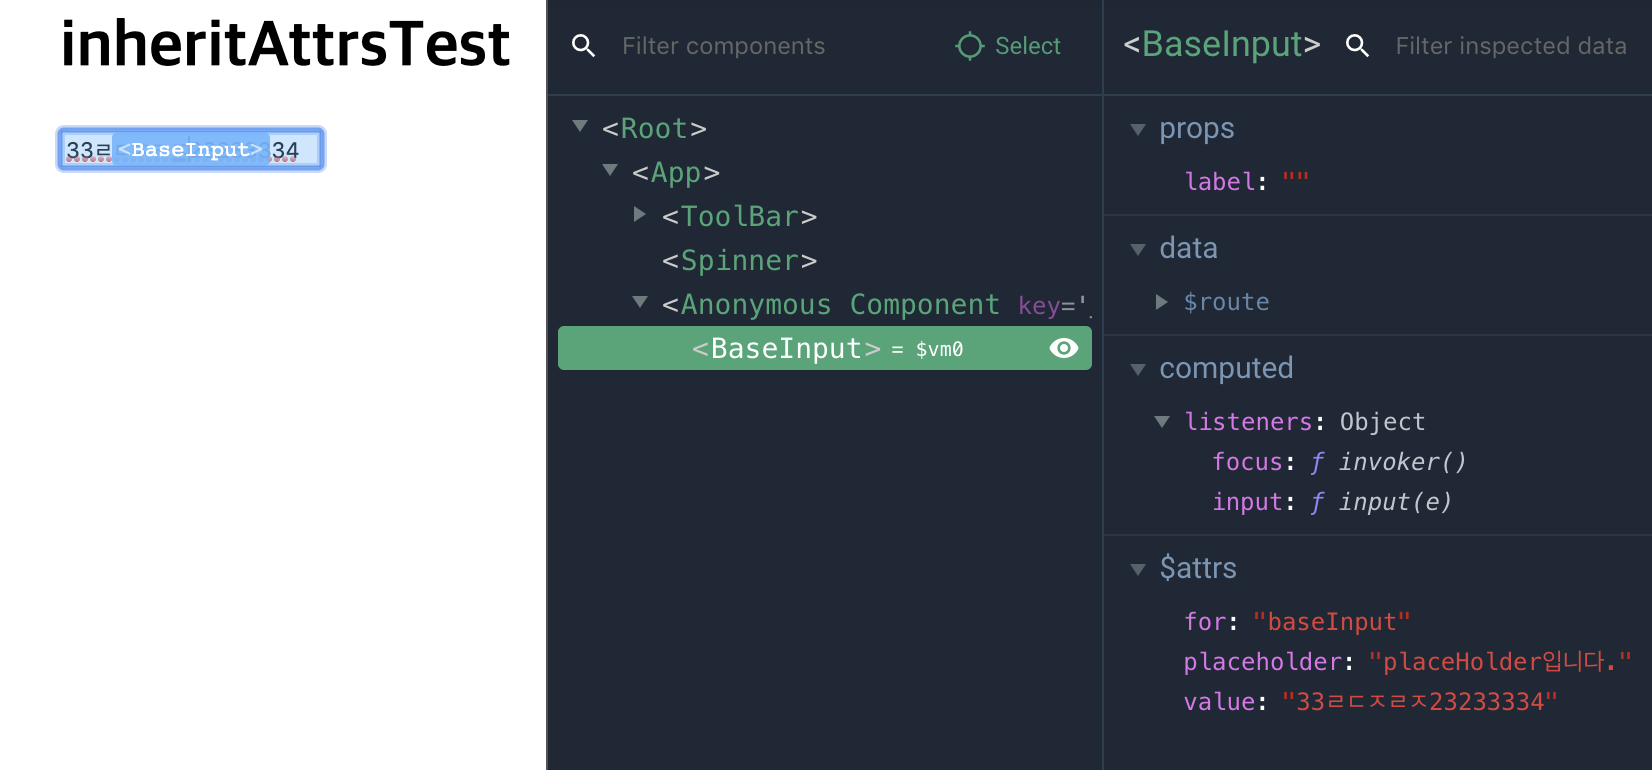
위와 같이 바로 v-model을 사용하여 input 컨트롤을 할수도 있고 focus 이벤트를 바로 매칭 할 수 있습니다.! 이렇게 를 통해 컴포넌트를 쉽게 래핑하는 패턴을 Transparent Wrappers 라고 하는데요. 이를 활용해 컴포넌트를 보다 효율적으로 작성이 가능합니다.